How to Install Board and Batten
5 min readStudy how to set up a Board and Batten wall. We’re listed here to enable you do it oneself with specialist-seeking benefits!
Appear see how to establish the vibrant yellow Swedish Mora Clock and the Dutch Barn Doorway / Infant Gate, much too!


Do it yourself Board and Batten Wall Tutorial
Resources for Setting up a Board and Batten Wall:
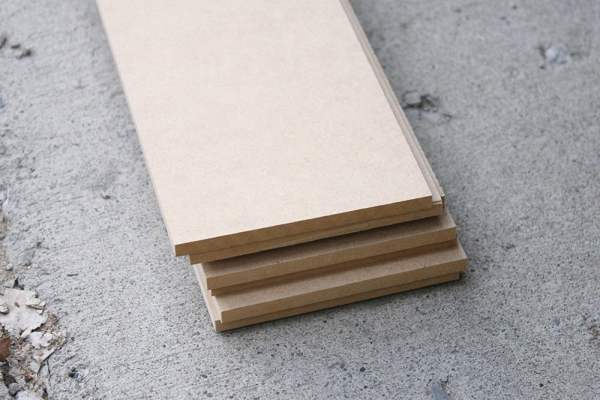
- Boards for Foundation Molding: We selected 1×8 MDF
- Boards for Crown Molding: We opted for a basic relatively than ornate appear and selected 1×4 MDF. We ran 1 on the wall and 1 on the ceiling to create a wrapped-corner appear.
- Battens (vertical boards): In the past we have employed 1×4 or 1×2’s that are the identical thickness as the upper and decrease molding, but this time I desired the battens to be little and insignificant to create a gentle texture. At our area Property Depot they had some 3 3/4″ x 1/4″ thick unpainted MDF strips called MDF Bender boards. They were being in the lumber isle close to the plywood and NOT with the moldings. They were being a great price tag and just wide adequate to be ripped (slice size-clever) in 50 percent to create the subtle appear I was heading for.
- Desk Saw
- Nail gun and nails
- Caulk and Hole Patching Compound
- Paint
Be guaranteed to verify out this tutorial for great board and batten spacing!
Board and Batten Step 1: Set up Foundation Molding
Evaluate, slice, and set up the base molding.

The stair employed to be wrapped with carpet, but we desired to prevent that and clear up the appear. We built out the stair a bit and then wrapped it with the MDF. We obtained fortunate and the MDF was the actual identical top as the stair!

Board and Batten Step 2: Set up Crown Molding
Evaluate and slice your crown molding parts. Employing the ceiling piece as a spacer, push the wall piece up to the ceiling piece (you will need to have a helper to do this, which is why we did not get any images) and nail in place.

Following set up your ceiling piece.

*Idea* We did not have joists to nail the crown molding to on this part of the ceiling. You can use anchor bolts for a Ton of extra get the job done or you can do what we did: to maintain the board in place, set in 2 nails at a forty five diploma angle to the ideal and then promptly change your nailer the other way and insert two much more in a forty five diploma angle to the still left. The “v” established by the nails functions like an anchor. I wouldn’t do this with significant beams, but for a light-weight molding, it operates well.

Board and Batten Step 3: Rip the Battens (if needed)
Our battens needed ripped in 50 percent, try to remember.


And due to the fact we slice ours, we took the time to sand down the prime two edges of the board to be certain that the edges were being clear and that all imperfections were being sanded down.
*Idea* Slash edges of MDF normally need to have sanding. Because MDF is so sleek, the imperfections will be really clear at the time you paint. Do not skip sanding!
Board and Batten Step 4: Set up the Battens
Be guaranteed to make your spacing great. Follow this board and batten spacing tutorial and you will end up with the specialist-seeking benefits you want!
1. Mark out the spacing.

2. Evaluate the top you will need to have for that batten in that place. Slash your batten. (Do this for every batten, as ceilings and floors are not as stage as you assume!)
3. Area the base of the batten at your spacing mark and nail at the time close to the base of the board to keep it in place according to your spacing mark.
4. Area a stage on the aspect of the batten board and alter the board until eventually it is flawlessly vertical.

5. Nail at the time close to the prime then safe it to the wall with a couple much more nails in the center.

6. Repeat the approach with every batten.
Board and Batten Step 5: Patch the nail holes and caulk all the seams
Patch the nail holes and caulk concerning the boards and the wall to fill the gaps.

Board and Batten Step 6: Paint
We selected Sherwin Williams High Reflective White, and, oh, the variance the paint can make! Make guaranteed to inspect your paint task from the still left and ideal to be certain every single inch of the battens is protected in paint. It’s simple to overlook the slender aspect up coming to the wall!

For painting the molding up coming to the flooring, I employed heavyweight scrapbook paper as a “drop cloth” of types. It moved alongside simply and slid beneath the gap of the base molding flawlessly with no taping required!
And we’re accomplished! See how the battens just type of melt into the wall? They provide a slight texture and sample but they are not the focal stage — specifically the subtlety we desired!

If you’d like to see much more of our tasks at the Canyon Residence, browse by way of them listed here and comply with us on Facebook and Instagram for much more inspiration and tutorials.
A lot more Do it yourself wall remedy tutorials:

This article originally released 05.04.2013 // Up-to-date 03.06.2020